Showing posts with label cross stitch. Show all posts

Monday, 10 February 2014

New Grounds - Drape & Shape


How you do it, it's right!

The other day I made my son a sandwich and he came back to the kitchen crying to break hearts. When I asked him what's wrong he said I did not make a sandwich as in half it and fold it on top of each other. I am sure if I would have done exactly that it would have been wrong as well. I am not questioning this behavior but I also can't blame him as I am not very different. 
I need things to be my way. Or maybe that is not true, I just don't want to feel uncomfortable, and sometimes things need a long time to be reduced to the max. When I had an outing to browse the High street I could find nice clothes, but looking closer or trying them on I could only find issues. The material was wrong or seams uncomfortable, it might have looked nice but it was hardly wearable and so on. I had to leave it and cannot call myself a customer anymore, even if I try very hard.

And now I am designing my own clothes I am not different at all. I might be very pleased with a new design but I need to put it to the test and only if I still like it then it will be part of my collection. This might be a too different approach as we live in a throw away society. But I always loved the garments worn to death the most and even when they were beyond it. 

T
he collection is completed and I am up to new grounds. In the collection I worked a lot with one-piece designs. The idea is that it is more comfortable to wear and a challenge but looks very different too. This time I wanted to drape more. This is even more of a challenge as drape and one piece is not easy to solve.

T
he top has one seam on one side. The other side drapes. Not too much as I still prefer plain cuts but enough to be a decorative element and shape around the body differently. The leggings are even more comfortable than the Hand stitched Yoga pants as there is hardly any contact to the body. 

Now in test phase and still only a first attempt in a new direction I am sketching and designing already more.....


Thursday, 12 September 2013

Questions

Why don't use your sewing machine for this?

For me it so normal to sew by hand that I still get a tiny shock being questioned. 
I know why i use my hands only, it is hard to explain to others though, especially in a time where time and technology run so fast. There are things I might consider using the machine for. But I cannot think of one at the moment. To be honest I often ask myself why did I have to start this? Also because it takes ages. The thing is I did not say one day I sew everything by hand from now on, it came to me and does not leave anymore. 

I have this thing with aerodynamic. Or maybe the better word is efficiency? I am always looking for the best, easiest, most logical, harmonic in everything and before I find no peace. This manifested for example in finally crocheting a soap and toothbrush holder out of orange fishing rope according to my needs, sewing fruit baskets out of rice bags and now I found a new material! Rip-stop.
No way I would use a machine with this.
It is slippery and uncomfortable to sew.

But I love my new wallet and medicine pouch. The material is easy to wipe, it is very thin and soft but because of being rip-stop I can use it in a single layer. And it does not cost a lot. I love pouches and clutches and containers and want to refer here to an older project - the Hand stitched washing bag - and I don't think I can have enough pouches ever. And a plus, I found an alternative for leather which I do not love to use.

Anyway, time changes, and at the moment I do not get a lot of working time. So more time for thinking, maybe....

Friday, 19 July 2013

no impact shorts

How to survive the heat

Every move is a mission, the head is heavy and the only craving is ice-cream after ice-cream. But then I remember how unbelievably uncomfortable I feel in the winter how stressful it is to keep warm and all looks different. The green/mate tea is my new companion, fruits are not allowed to run out and the orange juice lolly ice tray must be constantly refilled and frozen.


The latest obsession is to complete my summer wardrobe and for that reason I developed some shorts that are a fusion of my Yoga pants and the skirt that you might know from my movie. I might post about them later. Just to mention that they are in daily use, gorgeous on the bike and still dressed up enough to meet teachers. But they are just too hot to wear at home. So I thought that is the chance to use this nice cotton fabric I found ages ago. It is thin and a joy to look at.


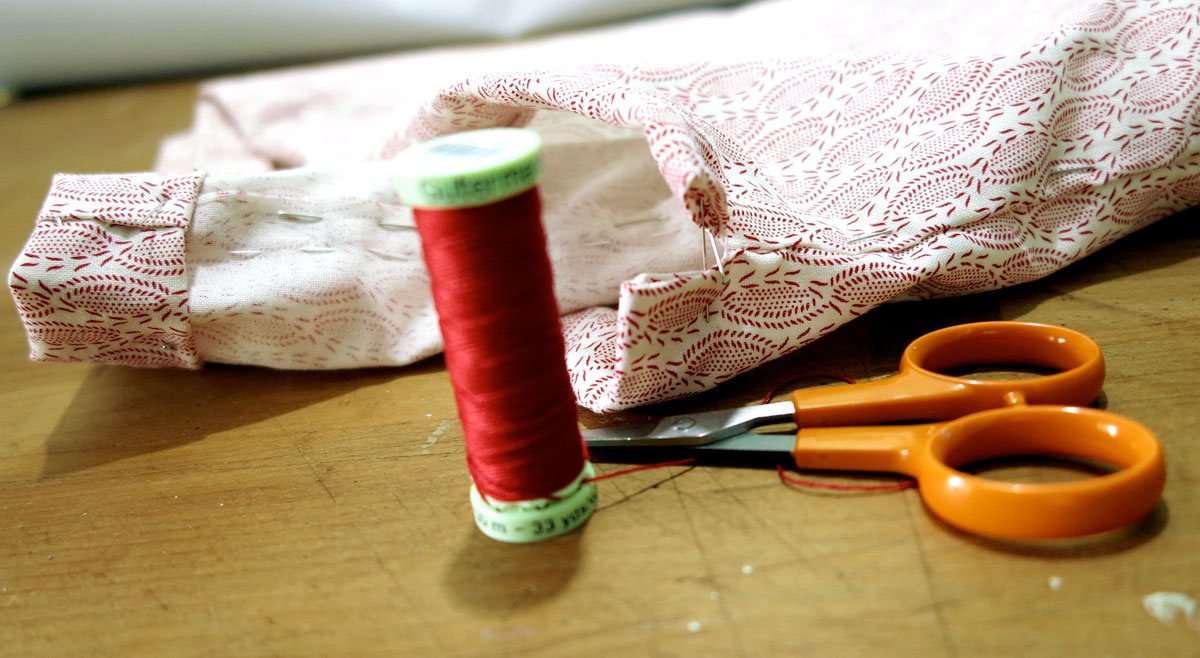
The cut is loose and straight, the seams are only folded over once apart from the waistband. I used red thread and the cross stitch which would not be necessary as the fabric is not stretchy but it helps to prevent fraying and looks good.
And I just looped a bit of leftover jersey through to tie at the front. And some hours later I am running around very happy about my no impact shorts....


Ideal for summer pjs too....


Monday, 1 July 2013

Bikini Top (Pattern)

Change the fabric and seam colour and have a new Bikini Top whenever you need it!

Once again this project started with a need. To go aqua running I needed a Bikini Top that is safe enough to wear and not to worry.
I usually find sportive bikinis too thick in material and not feminine enough, so I decided to create one myself. But it also seems that I want to be surrounded by handmade only. This is the second one I made for myself and they are both in constant use and test and I love them! But see for yourself.
If you enjoyed watching this movie please do't forget to share it. Thank you.
♥ handmade

If you watched the movie you can start now! All you need is Lycra, buttonhole Thread, a needle (sharps NO4), thin pins, fabric scissors, paper and paper scissors for the pattern (to repeat), a mat and a rotary cutter (optional).
The pattern is a fusion of a Bikini and a Tank Top. You can use a bra or bikini Top for reference (cup size) or just measure how wide the cup needs to be so you will feel safe. I cut the opening as low as possible but again not too deep to keep it safe. You will need 1 cm seam allowance. The band around the ribcage is 2 cm wide and 2x folded, which makes it very comfortable and strong enough to pull it tight.

The first version I made is black with a pattern and red seams, this new one is grey-ish with yellow seams, both very thin and comfortable. If you ask me now where are the pants for the Bikini Top I have to confess I had no time yet. But I guess you made your own Hand stitched knickers over and over again so I am sure you will finish your Bikini pants in no time and before I do ;)


Tuesday, 11 June 2013

bikini dreams

It was Saturday..

and like through magic I had a babysitter and went to the Swimming Pool. I arrived early enough to organize a member's card, chose a locker and changed. I had forgotten my costume. I went back to the reception and tried my best to find a solution, they even let me ring home as I did not have my phone on me, only to find out that there was no solution but going home. I know I had not slept the last nights due to little people kicking and crying but I was shocked how advanced my sleep deprivation had come. Walking back I really wanted to let go of being annoyed with myself. There I stood in front of the red door ringing the doorbell as I did not bring door keys either. And strangely enough magic lingered on. My mother in law suggested to take the kids to town to see the big ships at the docks. O wow. I had the afternoon off, workout and a nap. 

Tonight I try again. This time I will wear my costume on the way to the Pool. And it is a special one too. I designed a new Hand stitched bikini top and take it to the test. 

It is developed from my Hand stitched Tank Top design. I wanted to have a comfortable feminine top, sexy enough but also secure to survive a session aqua running without worries. 

I hope I succeeded or you will hear me scream.....


Thursday, 6 June 2013

infinity - sun and wind


Sunday and How to make A Hand stitched infinity scarf

It was a sunday and quite hot, especially for UK standards. We took the kids on a bike ride through the park to Sudley House. 

We aimed for the tea room and had coffee and apple juice and there I have seen her. A grandmother with her granddaughter and guess what she was wearing on her head to protect herself against the sun. . . the girls jumper! I contained myself with my what other people call Austrianess, for me it is just normal and did not talk about my newest sewing project. But I mentioned it before, I (you?) cannot have enough infinity scarves. 
So here it is the sun and wind version. 

This Hand stitched infinity scarf is made of a light marl grey cotton jersey and you don't want to spend the summer without it. 
Easy in preparation and finish this movie guides you step by step.


If you enjoyed watching this movie please do't forget to share it. Thank you.
♥ handmade


Friday, 31 May 2013

i can cu is ONE - enter the BIG anniversary Giveaway!


i can cu's 1y anniversary Giveaway


Almost one year ago i can cu made a step into the light and opened the shop at etsy i can c u - Hand stitched Yoga wear / fashion +
What a big event! It took a while to get settled and some months later the shop was filled with lots of Hand stitched garments and we had some nice photo shootings.....

Thank you to all customers, supporters, new friends and old ones! I cannot believe a year has past but I am also very proud it has!


And now.......every birthday needs a present, so this is it
The BIG 1y anniversary Giveaway!
Because of this special occasion i can cu launches a big Giveaway and you can win YOUR favorite Hand stitched Tank Top in a color of your choice. 
Additionally you can select the colour of the contrasting seam and the size. This Tank Top will be made especially for you!


Choose size S, M or L.

The seam colours can be blue, yellow, white, red, purple or orange.
The fabric can be chosen from a comfortable grey marl cotton-rib double jersey or a soft mauve single jersey cotton-mix (T-shirt) or a very thin dark blue cotton-rib jersey (slightly transparent and very soft) or 
a stretchy very soft mustard cotton-mix rib-jersey.
From casual to elegant, Yoga or dance you will love YOUR new favorite Hand stitched Tank Top.


Happy Birthday!


ENTER here
To enter the BIG 1y anniversary Giveaway share this Giveaway in media of your choice and leave a comment below this post and add the link and your name.

You have earned one additional entry in case 
you additionally followed i can cu's blog 
or favorited i can cu's FB page 
or followed i can cu's pinterest page 
or subscribed to i can cu's channel 
and this will increase your chance to win. (please add that to your comment)

The winner will be randomly chosen and announced on the 1st of July 2013. 
Love to you all. Thank you!


Monday, 27 May 2013

Quick & Easy Hairband

Gentle to your hair and very easy to make - a Hand stitched Hairband

Reproducing one of my latest projects over and over again, I had to think about how to use the leftovers of this gorgeous bamboo cotton jersey. This was not hard because I really don't like hairbands I can get in the supermarket and I don't want to scout for good ones.... and I always loose mine or rather spread them in unknown places. Just to demonstrate the cross stitch better I used white material for the movie.


If you enjoyed watching this movie, please don't forget to like, share ♥, thank you!

So this is what you need:
.stretchy jersey with lots of cotton in it so it won't be too slippery
.a plastic ruler
.a rotary cutter
.buttonhole thread
.a needle (sharps no4)
.some thin pins
.fabric scissors

.. preparation
Depending how you will use your hairband, determine a size that suits your needs.
With your rotary cutter cut a strip of about 4 cm width (but try also 3 or 2 cm, it depends on the size of your hairband and the thickness of your jersey) and the desired length along the grain line. Include 1 cm overlap in your strip and pin the overlapped ends (1 cm).


. . sewing
Thread your needle, make one single knot at the edge and about 7 mm higher up make a double knot.
Loop your thread around the edge and come up making the first bottom part of your Cross Stitch. Sew the Cross Stitch all along tip you reached the other edge, loop around it make a double knot close to the fabric and a single knot about 7 mm further away and trim.

Now you can pull you hairband and stretch it which makes the edges curl up, tuck in the area where the seam is.

Finished!

To be repeated in bigger or smaller sizes or thinner width and very useful to make it in the size that fits around your wrist........


Tuesday, 21 May 2013

Meet Dolly

Hello new friend . . 

Only a matter of time but now she finally made it, meet my new tailor's dummy. Hello!

Tuesday, 14 May 2013

How to sew knickers (pattern)

An easy DIY sewing-project to make Hand stitched Knickers and the pattern to reproduce them again

This is to complete the movie that you might have watched.
and NEW: choose Lycra for some swim pants and make your Bikini Top aswell...

. . . tools
. very good material like Bamboo/Cotton Jersey with some elastane
. knickers elastic band

. Buttonhole thread in colour(s) of your choice
. Sharps needle No4

. thin pins
. tailor's chalk


. pattern paper or similar
. pencil & paper scissors
. a plastic ruler
. iron 

. and your favorite pairs of knickers

... preparation
You do not need to ruin your favorite pairs of knickers! I did it to make an accurate pattern and it is easier to demonstrate how to do so. But it is also possible to trace around your favorite knickers without cutting into them, just more fiddly.
Cut open or not, trace around your knickers and transfer the shape to paper. Cut the template out using your paper scissors, fold it in half and see whether it is symmetrical. If not, average it and transfer the half again onto paper, this leaves you with your pattern. (As the fabric will be folded in half you only need the half pattern)

Half your fabric along the grain line, and trace the outline of your pattern using tailor's chalk. Cut it out on the inner side of your chalk line.


. . . construction
Right sides facing each other pin both side seams, 1 cm away from the edge. 

Thread your needle. Make one single knot close to the edge and make a double knot about 7 mm further up. Start sewing with making a loop (up through the fabric, around the edge and up through the fabric again right next to the previous hole) and continue in a straight line a straight stitch, try to stay about 1 cm from the edge and keep the stitches even. 

When you reached the end run your fingers along the stitches finding the right tension between fabric and thread. Finish with a loop and knot off, first make a double knot close to the fabric using your nails to gently push it there and a single knot a bit further away, trim.
Repeat on the other side.

Turn the knickers to the right side, separate the seams and fold them to each side and pin. Repeat on the other side.

Thread your needle, make the single and double knot and loop your thread through both seams around both edges, basically make a loop on each side and come up again to start the first bottom part of the cross stitch. The top part of the cross stitch is exactly the same but moved to the right. You always come up again where the last stitch ended. Down and through the fabric for the bottom part, come up again to finish the bottom part where the last top stitch ended and move to the top part and through the fabric again, up and so on. Finished one side, make the 2 loops and the knots, trim and repeat on the other side. 

Keep the top and bottom part of your cross stitch in a line, so the stitch looks regular. If you have to restart with a new thread make your knots and continue. 
For more details see also my cross stitch blog post.

Turn the knickers to the wrong side and fold 1 cm for the leg seam over and pin. Do this for both legs and repeat the cross stitch. Iron the seams, thread the needle, make the knots and start with the cross stitch. Finished with both legs there is only the elastic band to attach.

Use as much elastic band as comfortable and add about 2 cm for overlap. Start pinning at the back, half the elastic band and pin again, and so on till you have pinned all the way around.

Thread your needle, make the knots and start sewing a cross stitch next to the overlap (so you go over the overlap in the end). Stretch the elastic band while sewing the cross stitch all the way around, carefully to keep it aligned.

Finished!


Thursday, 9 May 2013

How-to sew a Hand stitched skirt

A DIY-sewing project by i can cu

Now, after practicing the Cross stitch ;)it is time to start the first project. It should be the season of showing more leg but it is also nice to wear one over leggings or tights, a skirt. This project is easy and can be repeated over and over again, shorter, longer, softer, brighter . . 

What you need
. Stretchy Jersey (anything that drapes nicely)
. Bottom seam of a T-shirt or a fold-over elastic band
. Thin Pins
. Gutermann Buttonhole / Top Stitch Thread in colour(s) of your choice
. Embroidery Scissors
. Milward Sharps Needle No4
. Cutting Matt
. Plastic Ruler
. Tape Measure
. Rotary Cutter
. Tailor's chalk or an erasable pen
. Fabric scissors


Measurements
First measure around your waist, your hips and around the widest part of your bottom.

Ready?
Half the fabric, align it and cut the edges straight (on one side, which will be the raw end of the skirt).Choose the length of your skirt, mark it and cut again.Cut the fabric in half now along the grain line using your fabric scissors, which leaves you with 2 halves of your skirt.Take one half and half it again along the grain line. Transfer the measurements taken earlier starting from the edge: first the waist measurement, leaving a 10 cm gap, then mark the hip measurement, leaving again a 10 cm gap and then mark the last measurement.Connect these 3 marks with your chalk or erasable pen, add 1 cm for seam allowance and cut, using your rotary cutter. Repeat the same for the other half. Half this half, transfer your measurements leaving a 10 cm gap between them, connect the marks and add 1 cm seam allowance and cut. If you don't like the angle and it would make your skirt too wide or too narrow, slightly adapt it but leave the waist measurement at the original point or very close to it, otherwise your waistband will have to accommodate too much fabric and this will make it very wavy.

Assembling
Now you can start pinning. Assemble both skirt halves, right sides facing each other, pin both ends first, which helps to align the fabric and then pin the rest, repeat for the other side.

Take about 2.5 skirt lengths of your thread and cut it in an angle to thread your needle  easier. Make one single knot close to the edge and make a double knot about 7 mm further up. See here and here for knot details.

Start sewing with making a loop (up through the fabric, around the edge and up through the fabric again right next to the previous hole) and continue in a straight line a straight stitch, try to stay about 8 mm from the edge and keep the stitches even.

When you reached the end run your fingers along the stitches finding the right tension between fabric and thread. Finish with a loop and knot off, first make a double knot close to the fabric using your nails to gently push it there and a single knot a bit further away, trim.

Repeat on the other side. The single knot, the double knot, loop around the edge, the straight stitch, adjusting the tension, the loop, double knot, single knot, trim.
Turn the skirt to the right side and fold one seam to the back and start pinning. On the other side fold the seam the same way, so they both face back and pin too.


The Cross Stitch
Thread the needle, make a single and double knot and loop the thread around the edge of your fabric. Choose to loop through the folded seam (thicker). Come up again through the fabric (below the created line) making the first bottom part of the cross stitch. 
The top part of the cross stitch is exactly the same but moved to the right. You always come up again where the last stitch ended.

Down and through the fabric for the bottom part, come up again to finish the bottom part where the last top stitch ended and move to the top part and through the fabric again, up and so on. Finished one side, make a loop and the knots, trim and repeat on the other side. Keep the top and bottom part of your cross stitch in a line, so the stitch looks regular. If you have to restart with a new thread make your knots and continue. More details for the cross stitch here. 

The Waist Band
Use as much waist band as comfortable around your waist and add 2 cm for overlap. 
Start pinning at the back, half the elastic band, and pin again. Quarter the elastic band and pin. . . Pin you way around, and keep checking that the fabric is fully tucked in while stretching it.Start sewing a cross stitch next to the overlap (so you go over the overlap in the end). The first few stitches can be tricky but as soon as you moved along it will be easier to find a rhythm again. Do the cross stitch all the way around so the last stitch meshes the first. Knot off, trim. Finished!I hope you enjoyed making this skirt, here is the movie this project is referring to. Thank you and see you at i can cu!


Thursday, 25 April 2013

Cross action (DIY cross stitch)

Cross stitching practice

You never know when you will need this gorgeous cross stitch - 
it might be very soon ;) 
So if you have a moment give it a try.
To sew a Hand stitched top or to mend jeans this cross stitch is versatile and an eye-catcher and stretchy!

You need: 
Material of your choice pinned, a needle (sharps#4), buttonhole thread and embroidery/fabric scissors.

THE KNOTS
Take about 2 arm's lengths of your thread or whatever length feels comfortable and thread your needle. 
Make 1 knot at the very end (about 2mm away from the edge) to prevent fraying.
And then about 1cm higher make 2 knots in the same place to fixate your thread at the start and end.
(The double knot in the same place might take a bit of practice)


For the cross stitch create 2 imaginary lines and let the cross stitch run along them. I usually choose to hold the fabric like shown below, with the seam folded upwards. (If you sew from the edge start with making a loop around the edge like shown at the infinity scarf project here: http://icancu4more.blogspot.co.uk/2013/01/diy-hand-stitched-infinity-scarf.html)


THE CROSS STITCH
Come up on the top (after the loop if you sew from the edge) and make the first bottom part of the cross stitch while moving a cross stitch width to the right.

The top part is exactly the same as the bottom part but moved to the right and then the next bottom part is again exactly the same as the top part moved to the right, the rhythm is determined by the width of your stitch.

Keep your top and bottom parts of your cross stitch in a line so your stitch looks regular with a nice rhythm.

KNOT OFF
End as you started (if you sew from the edge end by creating a loop from the back, around to the front and back again right next to the last stitch) and knot off using first the double knot. Slide the first knot of the double knot with your nail close to the fabric but do not pull the thread while doing this. Repeat for the second knot of the double knot. Followed by the single knot about 1cm away, trim.
Sometimes it can take a while to create a nice rhythm but start at a non prominent place.


And now you can watch The movie to learn the Cross Stitch:

If you enjoyed watching this movie, please don't forget to like and share it, thank you!

Thursday, 18 April 2013

2 steps forward . . .

. . and some Hand stitched Tops for ME!

The good thing about test and preparation phases is that MY wardrobe expands. Otherwise - well. I have to confess I am impatient. But actually that is not completely true, I think I am so very excited and want to see the outcome - especially this one, so I get impatient about things and their own timing. 
At the moment I feel like a tiger in a zoo trying to get out. I cannot move right now, I wait, have coffee and finish my newly graded tops. 


Waiting is actually only annoying when I resist it and that is why I am writing this blog post. I had coffee already twice, the kids are out and I am enjoying the different setting. 


It is not the working day I had planned. 

But there will be another one and I might get some steps closer next time. . . exciting! Stay tuned.


Friday, 15 March 2013

A dress on spring strike

Why does it take soooo long?

I feel like slowly awakening, I have no idea from what exactly, but the last weeks were tough with on and off sick family members and disturbed nights and working days to dream of. 

But then I spent the last 2 days in the studio and moved a big step forward. (Ah I almost forgot these 2 days also included the photo shooting - urban i can cu; wow, sometimes I am amazed what i can or cannot fit into one day.) 

The Proto type is finished (the 3 pics to the right), the pattern refined and the black Organic Hand stitched Dress (to the left) cut and pinned! 

I guess this fragmented working experience made it all take even longer and probably I am indirectly striking for warmer days too. But I also dedicated a lot of attention to the cut and pattern. I wanted the dress to be simple but feminine, cut to figure but also allow a natural change of waistline and keeping a good wearing comfort. (I still want to feel feminine and look good even if had some ice cream.)

The seams are at the back and at the front and give a nice eye-catcher. The lack of seams on the sides allow the dress to drape nicely around your sides. The dress remains rather short for now.

The plum/purple Organic Cotton Jersey Hand stitched tunic in comparison has a more flattering style and is much shorter ( . . and is on SALE too at the moment), if you want to take a look in my shop.

So spring, where are you?